What if the secret to crafting the perfect candle lies in understanding the common challenges every candle maker faces? By learning how to troubleshoot, you can transform obstacles into opportunities, leading to beautifully crafted candles every time.
This visual categorizes common candle crafting problems, their causes, and effective solutions to help you troubleshoot and improve your candle-making skills.
Causes: Improper wick size, short burn times, certain wax types.
Solutions: Right wick size, longer burn times, experiment with wax.
Causes: Rapid cooling, high pouring temp, some fragrance oils.
Solutions: Control cooling, pour at 130-160°F, compatible oils.
Causes: Wax shrinkage, temperature fluctuations.
Solutions: Preheat containers, consistent pour temp, heat gun.
Causes: Trapped air bubbles, environmental factors, overheating wax.
Solutions: Stir slowly, appropriate pour temp, heat gun for surface.
As a passionate candle maker, I’ve faced my fair share of obstacles while working on various projects. Understanding the common challenges in candle crafting can help you elevate your skills and create beautiful candles consistently. Identifying and fixing these issues is crucial for successful candle crafting, ensuring that your creations not only look good but also burn beautifully! For those new to the craft, our beginners guide to candle making provides an excellent foundation.
Whether you're a beginner or have some experience under your belt, knowing how to troubleshoot is a valuable asset. It not only saves you time and resources but also enhances your crafting journey. Let’s explore some of the most common candle crafting problems and how to address them effectively!

When you encounter a problem with your candles, it can be disheartening. However, troubleshooting is an opportunity to learn and improve your craft! Being able to pinpoint issues allows you to refine your techniques and produce candles that reflect your personal style.
Having a troubleshooting mindset means you can experiment and innovate, leading to exciting discoveries in your candle making journey. Embrace the challenges, and you'll find them to be stepping stones rather than roadblocks!
Now that we’ve talked about the importance of troubleshooting, let’s dive into some specific issues you might encounter while making candles. From tunneling to frosting, these challenges can hinder your crafting experience, but with the right solutions, you can overcome them!
Candle tunneling is a common problem where the wax burns down the middle, leaving a ring of unmelted wax on the sides. This not only looks unappealing but also wastes wax. Understanding why tunneling happens is the first step in finding effective solutions.
Several factors can contribute to tunneling in candles:
By assessing these elements, you can begin to diagnose the tunneling issues in your candles. Taking the time to understand these causes is essential for creating the perfect burn!
Here are some actionable steps to help you prevent tunneling:
Implementing these strategies will lead to a satisfying burn and a beautiful finish. Remember, patience is key in the candle-making process!
To help you visualize the solutions, I recommend checking out this video tutorial that demonstrates how to fix tunneling issues effectively. Watching someone else tackle these challenges can provide you with valuable insights!
Frosting, which appears as white spots on the surface of soy candles, is another common issue. While it doesn’t affect the candle’s performance, it can be frustrating for those who desire a flawless finish. Understanding how to manage frosting will improve your crafting results.
Frosting can occur due to several factors:
By being mindful of these causes, you can take steps to minimize frosting in your soy candles!
To reduce the chance of frosting, consider the following tips:
By implementing these practices, you’ll achieve smoother, more visually appealing candles that showcase your creativity!
Wet spots are another issue you might encounter, characterized by the appearance of moisture on the candle’s surface. These can detract from the overall aesthetic, but they are usually easy to fix!
Wet spots typically arise from:
Understanding these causes makes it easier to address the problem head-on!
Here are some techniques to help prevent wet spots:
These simple adjustments can make a significant difference in your finished candles.
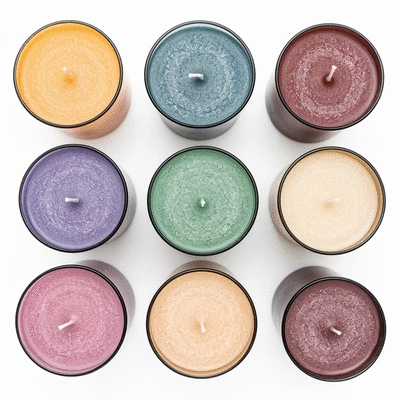
If you find yourself dealing with bumpy tops or surface imperfections, don’t worry! These problems can be addressed with a little attention to detail.
Common causes for bumpy tops include:
Recognizing these causes allows you to refine your technique and create smoother finishes.
To achieve beautifully smooth surfaces, consider these tips:
With practice and patience, you'll be able to craft stunning candles that are perfect in every way!
For those venturing into advanced candle-making techniques, challenges can arise with materials like gel and beeswax. Understanding these issues is essential for success!
Specific issues may include:
By preparing for these challenges, you can ensure a more successful crafting experience.
Here are some tailored fixes for advanced candle types:
With the right approach, you can master these advanced techniques and create beautiful candles that truly shine!
Did you know? One effective way to enhance your candle-making skills is to keep a detailed journal of your projects. Documenting your processes, materials used, and the outcomes allows you to pinpoint what works best for you. Over time, you'll develop a personalized approach that leads to even more successful and beautiful creations!
At Candle Craft Australia, we believe that the journey of candle making should be a delightful adventure! Each candle offers a blank canvas for your creativity, and I invite you to explore new techniques that not only enhance your skills but also result in unique creations. Why not try layering different colors or experimenting with seasonal themes? Candles can reflect your personality and the essence of different times of the year! To further personalize your creations, consider our guide on how to personalize your DIY candle experience.
Think about how much fun it would be to create a layered candle with a refreshing citrus scent for summer or a warm cinnamon blend for winter. Don’t hesitate to share your results with our community—your explorations could inspire others to embark on their own crafting journeys!
Remember, the most beautiful creations often come from a willingness to experiment and try something new. So, gather your supplies, unleash your creativity, and let each candle tell your story!
When diving into the world of candle making, questions are bound to arise! At Candle Craft Australia, I strive to equip you with the knowledge you need to tackle any challenges you might encounter. In this section, I’ll address some of the most frequently asked questions related to troubleshooting in candle crafting, ensuring you can continue making beautiful candles with confidence.
These common queries are just the tip of the iceberg! Don’t hesitate to reach out if you have more questions or need personalized guidance. Together, we can turn challenges into opportunities for growth and creativity in your candle-making endeavors! For those interested in sustainable options, explore our article on sustainable wax for candle making.
Here is a quick recap of the important points discussed in the article: